Single sign-on
SSO lets your team sign in to Mitzu through your company's identity provider instead of managing a separate password. SSO is configured once at the organization level and applies to every workspace. Mitzu supports:
- AWS Cognito
- Google SSO
- Any OIDC (OpenID Connect) compatible identity provider, such as Okta or OneLogin.
AWS Cognito
Create a new app client in AWS Cognito
- Sign in to Mitzu and open the Single Sign-on tab in Workspace Settings. Once SSO is enabled, you can configure the integration details:
- Open the AWS Console and create a new app client in your AWS Cognito user pool with the following settings:
- Auth type: Confidential client
- Allowed callback URLs: copy the full value of the Redirect URL field from the Mitzu SSO settings
- OAuth 2.0 grant types: Authorization code grant
- OpenID Connect scopes:
emailmust be selected
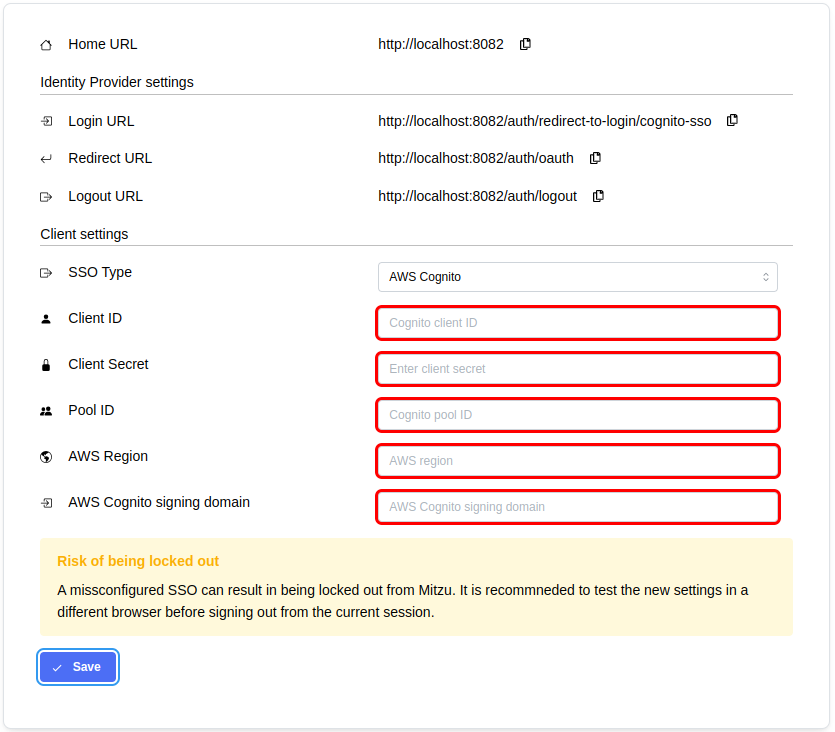
Configure Mitzu with the Cognito app client
- Fill in the client settings on the Mitzu SSO page:
- Client ID and Client Secret — taken from the app client settings page in AWS.
- Pool ID, AWS Region, and AWS Cognito signing domain — taken from the user pool settings page in AWS.
- Click Save.
Google SSO
Create a new app client in Google
- Sign in to Mitzu and open the Single Sign-on tab in Workspace Settings. Once SSO is enabled, you can configure the integration details:
- Open the Google Cloud Console and create a new OAuth 2.0 Client ID (APIs & Services → Credentials) with the following settings:
- Application type: Web application
- Authorized redirect URIs: copy the full value of the Redirect URL field from the Mitzu SSO settings
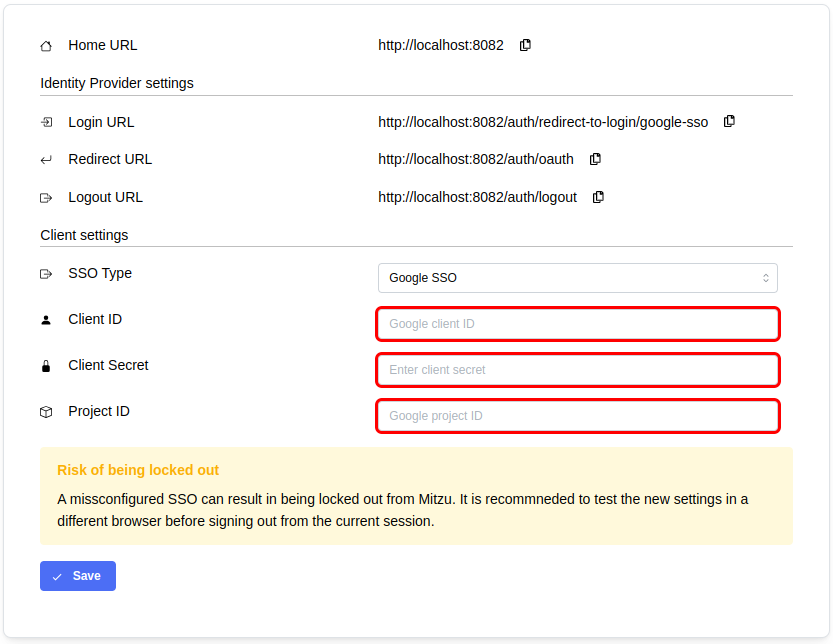
Configure Mitzu with the Google app client
- Fill in the client settings on the Mitzu SSO page:
- Client ID and Client Secret — taken from the OAuth client settings page.
- Project ID — shown on the Cloud Overview → Dashboard page in the project info box.
- Click Save.
OIDC
Create a new app client in your identity provider
- Sign in to Mitzu and open the Single Sign-on tab in Workspace Settings. Once SSO is enabled, you can configure the integration details:
- Open the web console of your identity provider and create a new client application with the following settings:
- Application type: Web application
- Grant type: Authorization Code
- Sign-in redirect URIs: copy the full value of the Redirect URL field from the Mitzu SSO settings
- Sign-out redirect URIs: copy the full value of the Home URL field and append
/auth/unauthorized - To let users start the login from the identity provider side, redirect them to the Home URL appended with
/auth/redirect-to-login - Client authentication: client secret
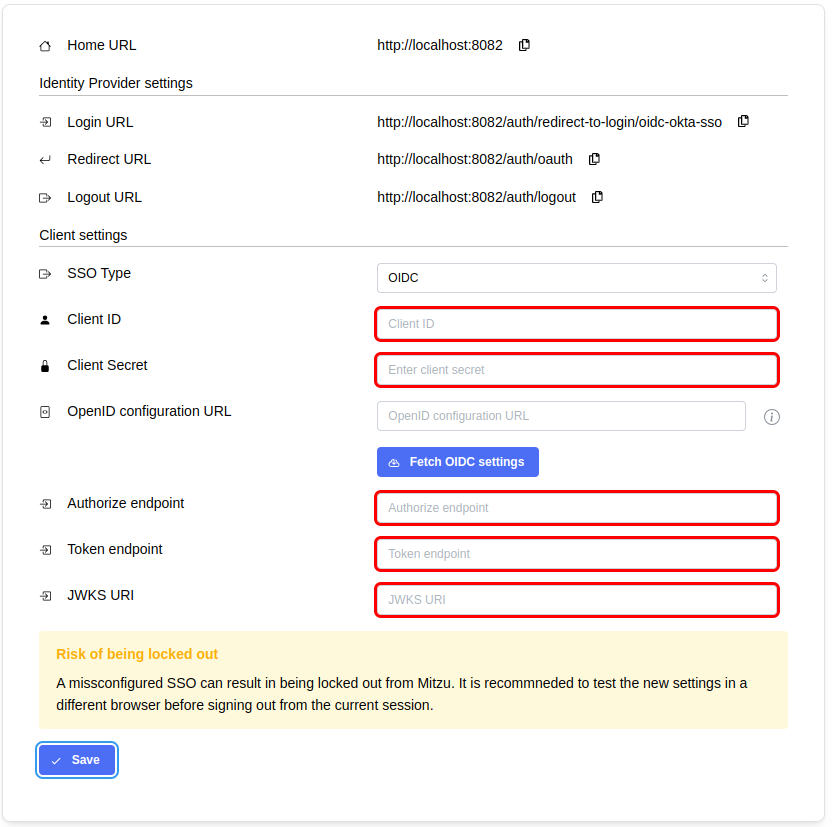
Configure Mitzu with the OIDC app client
- Fill in the client settings on the Mitzu SSO page:
- Client ID and Client Secret — taken from the OIDC app client's settings page.
- Authorize endpoint, Token endpoint, and JWKS URI — configure these manually, or paste the
<idp>/.well-known/openid-configurationURL and click Fetch OIDC Settings to fill them in automatically.
- Click Save.
Verify login flow
In a different browser (or in an incognito window) verify the login flow. If it is not working as expected then please supervise your settings or contact Mitzu Support.